
How to Use Restrict Editing in Word in 2024: A Comprehensive Guide
Introduction to Restrict Editing
How to use restrict editing in words? Microsoft Word, a part of Microsoft Office Suite, has continually evolved to meet the demands of its users, offering more sophisticated features for document security. One such feature is “Restrict Editing,” designed to give document creators control over who can edit and what can be edited in a document. This feature is invaluable for anyone looking to share their work without compromising security or control.
Step-by-Step Guide for How to Use Restrict Editing in Word
Step 1: Accessing Restrict Editing
- Open your Word document.
- Click on the “Review” tab on the ribbon.
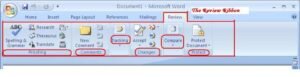
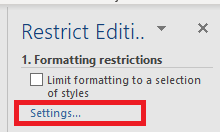
- Find and select “Restrict Editing” in the “Protect” group.
Step 2: Choose Your Restriction Settings
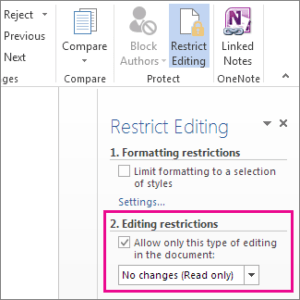
Once you’ve accessed the Restricted Editing panel, you’ll be presented with several options:
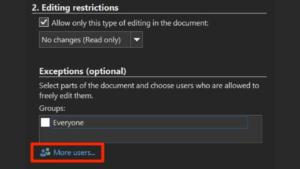
- Editing restrictions: You can limit how the document can be edited or select ‘No changes (Read only)’ to make the document non-editable.
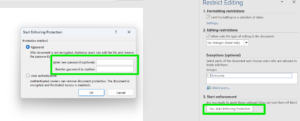
- Start enforcement: After setting your restrictions, click “Yes, Start Enforcing Protection” to activate them. You may be prompted to set a password. Choose a strong password and keep it secure.
Step 3: Exception Handling
In some cases, you may want certain parts of the document to remain editable:
- Highlight the text in which you wish to be exempt from restrictions.
- In the Restrict Editing panel, under “Exceptions,” select the users who can edit the highlighted sections. This requires those users to be authenticated.
Step 4: Saving and Sharing Your Protected Document
- Save your document. Consider securely communicating the password to authorized editors if you’ve chosen to set one.
- Share your document with the peace of mind of knowing it’s protected.
Advanced Tips for Restrict Editing
- User Authentication: For organizations using Microsoft 365, user authentication can add an extra layer of security, allowing only specific users to edit the document.
- Track Changes: Combine restricted editing with “Track Changes” to monitor and review any permitted edits.
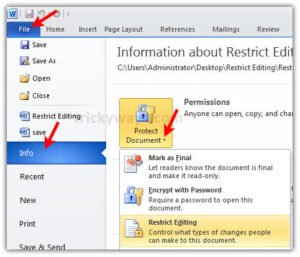
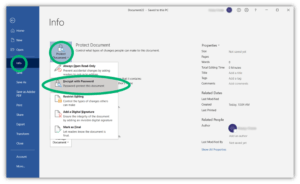
- Document Inspection: Before finalizing your document, use the “Document Inspector” under “File” > “Info” to remove any hidden data or personal information that might be stored.
Importance: Embracing Document Security in 2024
If you still have a question: How to use restrict editing in word? We want to believe this guide has proven useful to you and answered your question. The importance of document security cannot be overstated. By utilizing the restricted editing feature in Word, individuals and organizations can safeguard their documents, ensuring that only authorized edits are made and maintaining the integrity of their content.
This guide has walked you through the steps to implement restricted editing and provided advanced tips for maximizing document security. By embracing these practices, you’re protecting your documents and ensuring they convey the intended message and information as accurately and securely as possible.
FAQ:
How do I enable restricted editing in Word?
Open your document, click on the “Review” tab, then select “Restrict Editing” in the “Protect” group. Choose your restrictions, click “Yes, Start Enforcing Protection,” and set a password if desired.
How do I enable locked edits in Word?
Go to the “Review” tab, click “Restrict Editing,” set your editing restrictions under “Editing restrictions,” then click “Yes, Start Enforcing Protection,” and optionally set a password.
How do you restrict editing by filling in forms in Word?
In your form document, click “Review” > “Restrict Editing,” select “Filling in forms” under “Editing restrictions,” then click “Yes, Start Enforcing Protection,” and possibly set a password.
How do I turn off editing mode in Word?
To disable Track Changes, select “Track Changes” in the “Review” tab to turn it off. To edit restrictions, click “Restrict Editing” and then “Stop Protection,” enter a password if required.